Setting up Single Sign-On between Azure Active Directory and GoodData
Version Compatibility Notice
The content of this article is valid for the version of GoodData that was current as of 14 April 2021. Features or behavior in newer versions may differ.
Azure Active Directory supports SAML2.0, therefore it’s possible to set up SSO connection to GoodData, where the Azure AD will serve as an Identity provider.
This article describes necessary steps to set up this connection for a simple identity provider initiated scenario.
Step 1: Add GoodData as a new enterprise application
-
Log into your Azure portal at http://portal.azure.com
-
Go to Azure Active Directory (found among Azure services)
-
In the Azure Active Directory, click Enterprise Applications
-
Click + New application
-
Click + Create your own application and in the subsequent dialogue, you should name it (it is only the identifier of the app inside of your Azure) and choose Integrate any other application you don’t find in the gallery
-
Click create
Step 2: Configure the SSO for the newly created application
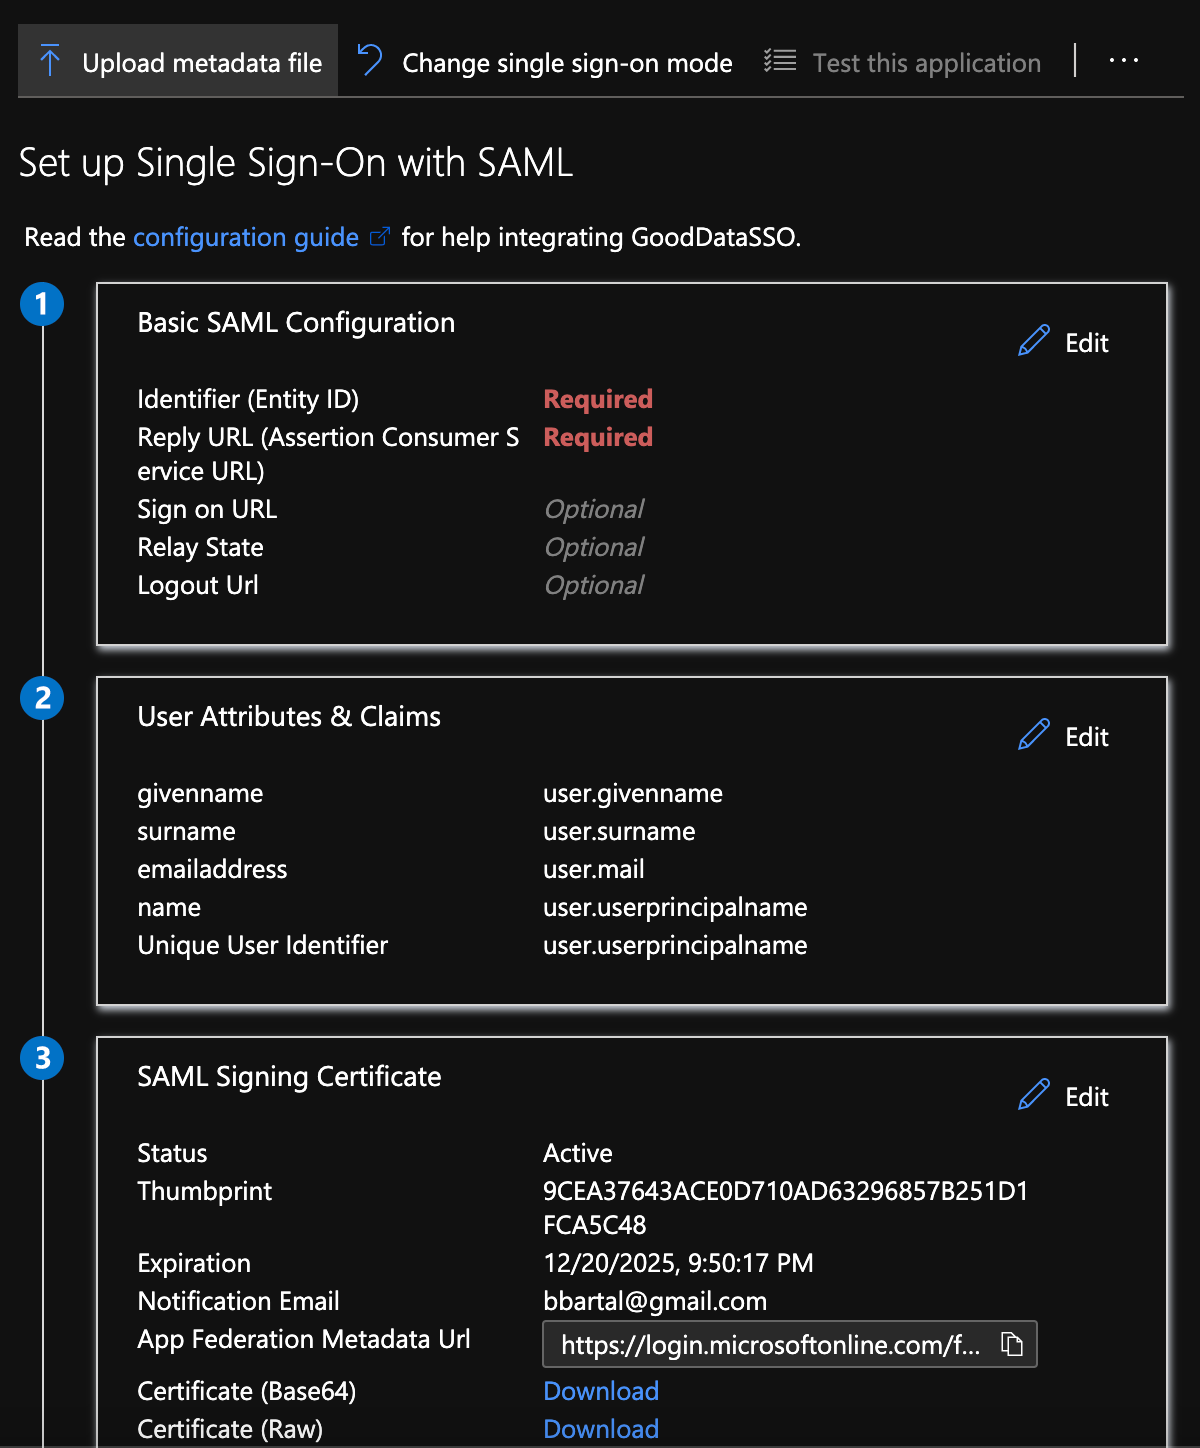
In the application, click on Single Sign-On (either on the side panel or in the app overview) and select SAML. Now you are in the SAML configuration interface.
- Identifier (Entity ID) - Specifies the IdP identifier inside of the AD. It is not important for integrating with GoodData and can be set to any value. Don’t forget to set the value as default.
- Reply URL - API endpoint on GoodData side that will accept and process the SAML message. It should be set to
https://<your.gooddata.domain>/gdc/account/samllogin. - Sign On URL - You can leave this empty.
- Relay State - Specifies where you will be redirected after successful login (default is
/dashboard.html, but can be set to a specific GoodData dashboard if you want to redirect users there). - Logout URL - You can either leave it empty or use
https://<your.gooddata.domain>/gdc/account/samllogoutif you wish to use single logout. - User Attributes & Claims - You only need one claim - Unique User Identifier (Name ID) (found under required claims), you can delete the rest (all additional claims). Click on the Unique User Identifier (Name ID) claim - name identifier format should be email address and the source attribute should correspond to the GoodData login name (most likely
user.mail). - SAML Signing Certificate
- In signing option select Sign SAML response and assertion.
- Signing algorithm should be SHA-256.
That should be all regarding SSO config in Azure.
Step 3: Assign users and groups to the application
This should be done in the Users and Groups tab within your application. By clicking + add user/group, you should be able to add the users or user groups you want to be able to use the SSO.
Step 4: Setup the Identity provider on the GoodData side
- In the Single sign-on overview, there is an option to download Federation Metadata XML.
- Based on the values in the XML file you can use ssoProvider API, to create required configuration on the GoodData side. You can follow SAML SSO with GoodData documentation page for more details on the process.
- Users in GoodData need to be assigned this SSO provider name in their configuration. This can be done via API by domain admin: Update a user’s information (ssoProvider parameter), via users brick: Users Brick (
sso_providerparameter) or GoodData support can help you in case it’s only for a couple of users for testing purposes. Each user can have multiple SSO providers assigned (the values should be just separated by comma"ssoProvider": "sso_provider_1, sso_provider_2").
Step 5: Test the connection
Once everything is setup you can use several ways to test the SSO connection from Azure to GoodData:
- In the Azure SSO section, there is a test button, that should allow you to test the connection.
- In the APP properties, you can find a User access URL link. If you navigate to this URL, Azure should trigger the SSO connection to GoodData.
- My Apps Secure Sign-in browser extension allows you to click the app and trigger the SSO connection.


